# Rollup
Rollup和Webpack一样,也是一款打包工具。经过一番研究,在最近的一个小项目nos-js-uploader选用了Rollup作为打包工具。
同时也发现Vue、React、Three.js以及很多知名的库也在使用Rollup。
为什么要用它?怎么使用它的?有哪些库使用它?
更新时间: 2019-03-25
我是导航条:
# Webpack和Rollup的区别
# Webpack
Webpack是在2012年发布的,最初的目的是:构建复杂的单页应用程序(SPA)。
它最大的两个特性:
- 代码分离
- 把代码分离到不同bundle中,然后可以
按需加载或并行加载这些文件。
- 把代码分离到不同bundle中,然后可以
- 静态资源
- 将所有静态资源导入到应用程序中,进行处理。
打包原理:将每个模块封装成一个函数,并将他们放在一个包中。通过浏览器的
require实现导入,逐一执行。
优点:能处理很多事情(包括静态资源、HTML、CSS)。
# Rollup
Rollup可以让开发者,将项目 按功能 拆分成一个个子目录。通过模块化的方式,让这些模块相互引用,通过Rollup打包成一个单独JS(即bundle)。
打包原理:把所有代码放在同一个地方,然后一次性执行,从而生成
更简洁、更简单的代码,启动更快。
优点:
- 只处理JS,打包速度快
- 自动Tree-shaking(清除项目中没使用到的代码)
- 配置简单
缺点:能处理大多数CommonJS文件(通过插件),但有些语法根本不能转义为ES6
# 两者的选择原则:
Webpack一般适用于大型应用
- 支持:代码拆分
- 支持:处理很多静态资源
- 支持:引入很多CommonJS模块的依赖
Rollup一般适用于JavaScript库
- 基于ES6模块
- 希望他人直接能使用
# 开始使用Rollup
# 安装
npm install -save-dev rollup
# 编写配置文件rollup.config.js
// rollup.config.js
export default {
   input: 'src/main.js',
   output: {
      file: 'dist/js/main.min.js',
      format: 'umd',
      name: 'bundle-name'
   }
}
2
3
4
5
6
7
8
9
参数说明:
- input:要打包的文件
- output
- file:输出的文件
- format:输出的文件类型(amd | cjs | es | life | umd)
- amd:异步模块定义(用于像RequireJS这样的模块加载器)
- cjs:CommonJS,(适用于Node和Browserify/Webpack)
- es:将软件包保存为ES模块文件
- life:一个自动执行的功能,适合作为
<script>标签 - umd:通用模块定义,以amd、cjs和life为一体
- name:生成包名称
# 启动rollup
一般通过package.json进行打包命令,其中的 -c 表示直接按照配置文件(rollup.config.js)开始打包。
"scripts": {
   "build": "rollup -c"
}
2
3
# 常用的Rollup插件
# 兼容CommonJS
原因:Rollup不能识别CommonJS模块,并且在npm中的大多数包都是以CommonJS规范进行开发。需要兼容CommonJS,将CommonJS模块转换成ES6模块。
解决方法:
1、rollup-plugin-commonjs、rollup-plugin-node-resolve
(会和rollup-plugin-node-resolve搭配使用,后者是用来解析依赖的模块路径)
npm install --save-dev rollup-plugin-commonjs rollup-plugin-node-resolve
2、更新rollup.config.js
// rollup.config.js
import commonjs from 'rollup-plugin-commonjs'
import resolve from 'rollup-plugin-node-resolve'

export default {
   input: 'src/main.js',
   output: {
      file: 'dist/js/main.min.js',
      format: 'umd',
      name: 'bundle-name'
   },
   plugins: [
      resolve({
         jsnext: true, // 表示将原来的node模块转化成ES6模块
         main: true, // 决定要将第三方模块内的哪些代码打包到最终文件中
         browser: true // 同上
      }),
      commonjs()
   ]
}
2
3
4
5
6
7
8
9
10
11
12
13
14
15
16
17
18
19
20
# 使用Babel
原因:Rollup不会对ES6的语法(除了ES6模块)进行编译。如果需要使用ES6的语法进行开发,还需要使用babel来把ES6的代码编译成ES5。
解决方法:
1、rollup-plugin-babel
npm install --save-dev rollup-plugin-babel@latest
2、配置.babelrc
{
   "presets": [
      [
         "@babel/preset-env",
         {
            "modules": false
         }
     ]
   ],
   "compact": false
}
2
3
4
5
6
7
8
9
10
11
上面的modules为true的话,Babel会在Rollup处理之前,将我们模块先转成CommonJS,导致Rollup处理失败
3、更新rollup.config.js
// rollup.config.js
import commonjs from 'rollup-plugin-commonjs'
import resolve from 'rollup-plugin-node-resolve'
import babel from 'rollup-plugin-babel'

export default {
   input: 'src/main.js',
   output: {
      file: 'dist/js/main.min.js',
      format: 'umd',
      name: 'bundle-name'
   },
   plugins: [
      resolve({
         jsnext: true, // 表示将原来的node模块转化成ES6模块
         main: true, // 决定要将第三方模块内的哪些代码打包到最终文件中
         browser: true // 同上
      }),
      commonjs(),
      babel({
         exclude: 'node_modules/**'
      })
   ]
}
2
3
4
5
6
7
8
9
10
11
12
13
14
15
16
17
18
19
20
21
22
23
24
# 使用ESLint
解决方法:
1、rollup-plugin-eslint
npm install --save-dev rollup-plugin-eslint
2、配置.eslintrc(也可以通过./node_modules/.bin/eslint --init生成大多数配置)
3、更新rollup.config.js
// rollup.config.js
import commonjs from 'rollup-plugin-commonjs'
import resolve from 'rollup-plugin-node-resolve'
import babel from 'rollup-plugin-babel'
import { eslint } from 'rollup-plugin-eslint'

export default {
   input: 'src/main.js',
   output: {
      file: 'dist/js/main.min.js',
      format: 'umd',
      name: 'bundle-name'
   },
   plugins: [
      resolve({
         jsnext: true, // 表示将原来的node模块转化成ES6模块
         main: true, // 决定要将第三方模块内的哪些代码打包到最终文件中
         browser: true // 同上
      }),
      commonjs(),
      babel({
         exclude: 'node_modules/**'
      }),
      eslint({
         include: ['src/**'],
         exclude: ['node_modules/**']
      }),
   ]
}
2
3
4
5
6
7
8
9
10
11
12
13
14
15
16
17
18
19
20
21
22
23
24
25
26
27
28
29
# 用replace替换环境变量
原因:在bundle里,出现的ENV变量,如何做到统一根据实际值来替换?
解决方法:
1、rollup-plugin-replace
npm install --save-dev rollup-plugin-replace
2、更新rollup.config.js
// rollup.config.js
import commonjs from 'rollup-plugin-commonjs'
import resolve from 'rollup-plugin-node-resolve'
import babel from 'rollup-plugin-babel'
import { eslint } from 'rollup-plugin-eslint'
import replace from "rollup-plugin-replace"

export default {
   input: 'src/main.js',
   output: {
      file: 'dist/js/main.min.js',
      format: 'umd',
      name: 'bundle-name'
   },
   plugins: [
      resolve({
         jsnext: true, // 表示将原来的node模块转化成ES6模块
         main: true, // 决定要将第三方模块内的哪些代码打包到最终文件中
         browser: true // 同上
      }),
      commonjs(),
      babel({
         exclude: 'node_modules/**'
      }),
      eslint({
         include: ['src/**'],
         exclude: ['node_modules/**']
      }),
      replace({
            exclude: 'node_modules/**',
            ENV: JSON.stringify(process.env.NODE_ENV)
            // 找到每一个 ENV ,并用 process.env.NODE_ENV 去替换
            // JSON.stringify 用来确保值是双引号的
      }),
   ]
}
2
3
4
5
6
7
8
9
10
11
12
13
14
15
16
17
18
19
20
21
22
23
24
25
26
27
28
29
30
31
32
33
34
35
36
# 用uglify压缩
原因:减少bundle体积(通过移除注释、缩短变量名等)
解决方法:
1、rollup-plugin-uglify
npm install --save-dev rollup-plugin-uglify
2、更新rollup.config.js
// rollup.config.js
import commonjs from 'rollup-plugin-commonjs'
import resolve from 'rollup-plugin-node-resolve'
import babel from 'rollup-plugin-babel'
import { eslint } from 'rollup-plugin-eslint'
import replace from "rollup-plugin-replace"
import uglify from "rollup-plugin-uglify"
import { minify } from 'uglify-es';

export default {
   input: 'src/main.js',
   output: {
      file: 'dist/js/main.min.js',
      format: 'umd',
      name: 'bundle-name'
   },
   plugins: [
      resolve({
         jsnext: true, // 表示将原来的node模块转化成ES6模块
         main: true, // 决定要将第三方模块内的哪些代码打包到最终文件中
         browser: true // 同上
      }),
      commonjs(),
      babel({
         exclude: 'node_modules/**'
      }),
      eslint({
         include: ['src/**'],
         exclude: ['node_modules/**']
      }),
      replace({
            exclude: 'node_modules/**',
            ENV: JSON.stringify(process.env.NODE_ENV)
            // 找到每一个 ENV ,并用 process.env.NODE_ENV 去替换
            // JSON.stringify 用来确保值是双引号的
      }),
      uglify(
         {
            compress: {
               drop_console: true,
            },
            mangle: {
               reserved: ['Event'],
            }
         },
         minify,
      )
   ]
}
2
3
4
5
6
7
8
9
10
11
12
13
14
15
16
17
18
19
20
21
22
23
24
25
26
27
28
29
30
31
32
33
34
35
36
37
38
39
40
41
42
43
44
45
46
47
48
49
# 有哪些代码库使用了Rollup
# Vue的底层源码
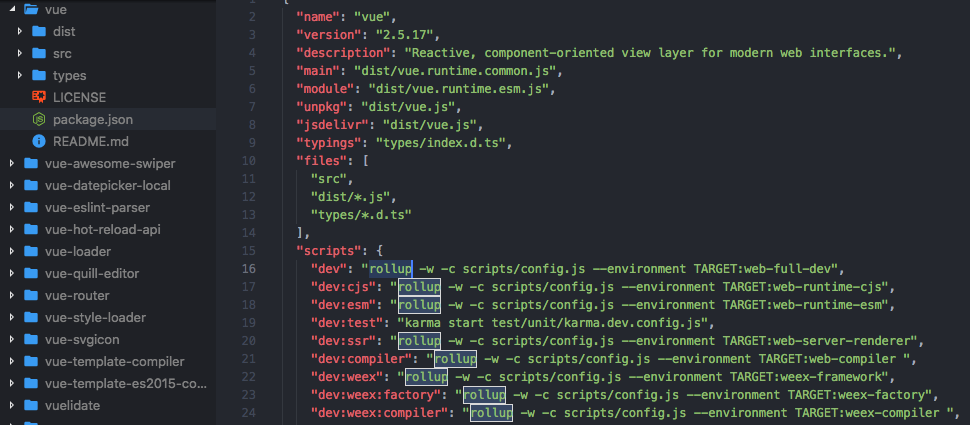
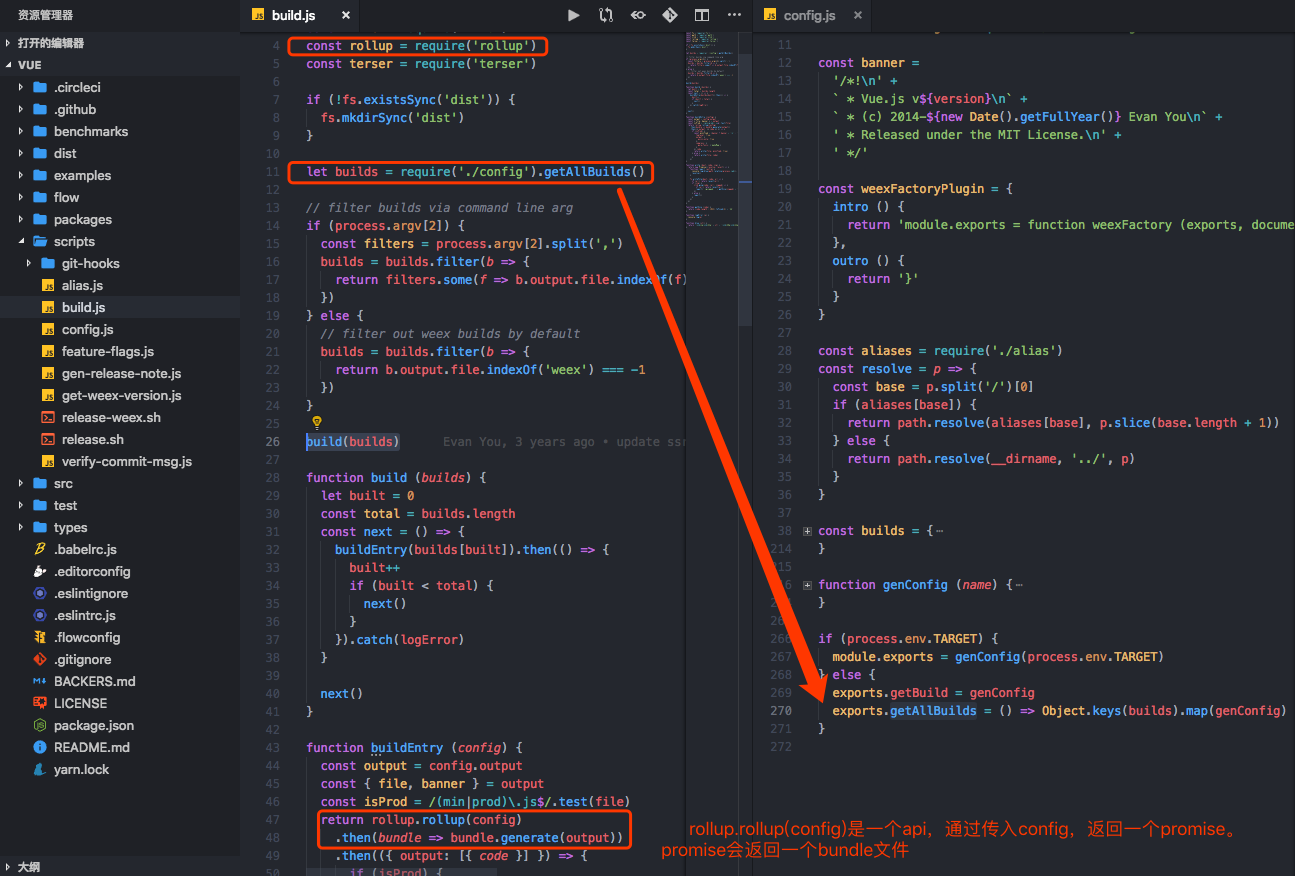
Vue的底层源码是使用Rollup打包的:


上面我写错了,promise不会返回一个bundle文件,而是一个bundle对象。后续可以通过bundle.generate()、bundle.write()来生成最终的bundle文件。
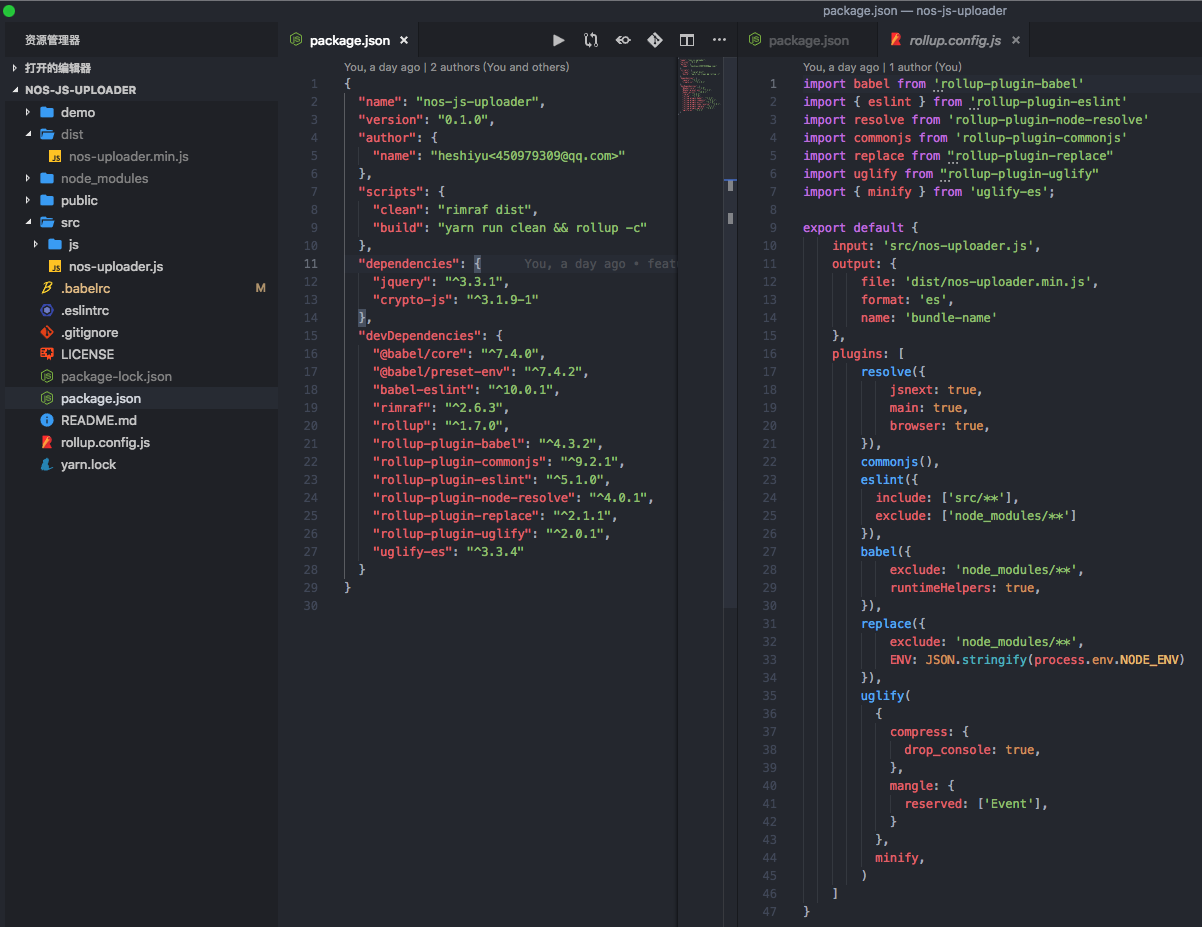
# 我自己的小项目
